| Summary: This page describes the operations of creating a text box, editing the
text box and setting text attribute. |
| Table of contents: Text box, Editing text |
1. Text box
return=>page top
Command:create, basic shape, add text box, delete text box, move text box boundary, change a shape with a text box, grouping text boxes, fornatting
|
Operation
|
Description
|
|
create

|
Click on the button and drag over the canvas diagonally, then a text box
which fitting to the dragged rectangle will be displayed.
Basically thie created rectangle is same as the left side of the following basic shape.
|
basic shape
 |
For a basic shape such as a rectangle, round rectangle or ellipse, a text
box is created at the same time when the basic shape is created. The text
area inside the text box is shown as a green frame. While the green frame
is shown, the text box is editable i.e. you can input a text or edit it.
If you click on the other place, the green frame disappear and you cannot
edit the text. To enable the text box editable, you just click inside the
text box.

|
add text box, delete text box
|
For a closed polyline(polygon) or a closed piecewise cubic curve,
a textbox isn't created when the shape is created, because these type of shape
will be almost always modified or fine-tuned after its creation.
So when you get a satisfactory shape, you might want to add a text box to the shape.
At that time you can add a text box using "add textbox" command.
If you want to remove the text box from the shape, you just use "delete
textbox" command.
The figure below shows the scene when the "add textbox" command is executed.
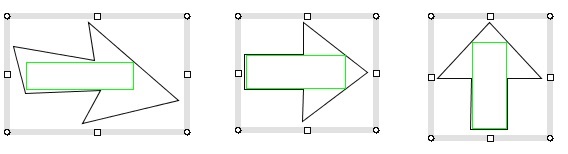
The calculation to define the appropriate text box area tries to find a
rectangle as large as possible which is inscribing to the shape boundary.
The calculation may be good for a convex shape, but not always satisfactory
for a concave shape (see the Figure_(c)). Therefore we provide the way
to change the text box area (move text box boundary).
|
| Figure_(a) |
Figure_(b) |
Figure_(c) |
Figure_(c) shows that the rectangle at the arrow shape may be larger than
that at the center of the shape.
|
|
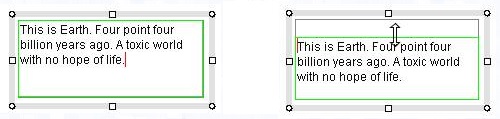
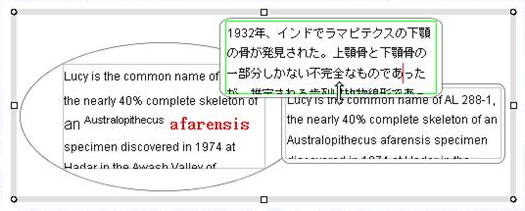
move text box boundary |
Click inside a text area then the green frame is displayed. While the green
frame is displayed, you can move the edge of the green frame by resize cursors.
The resize cursors :  are available for this operation, but the diagonal resize cursor :
 are unavailable. are unavailable.
 |
| Figure(a) Original |
Figure_(b) Move the upper edge downward. |
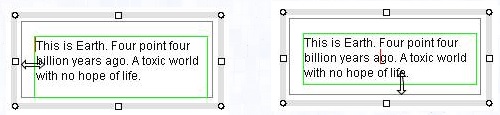 |
| Figure_(c) Move the left edge rightward |
Figure (d) Move the lower edge upward |
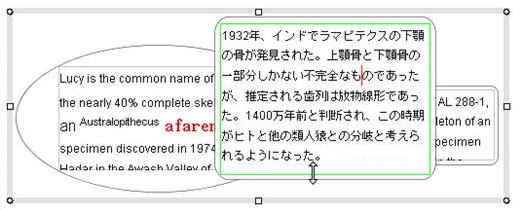
The case that an edge of the green frame is moved largely
If you move the edge largely beyond the bounging box of the shape,
the shape will be also resized largely as the figure below.
Note: If you back the same edge to its original position, the shape won't be resized smaller (Figure (h)).
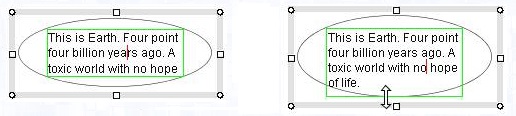 |
| Figure(e) Original |
Figure (f) Move the lower edge downward. |
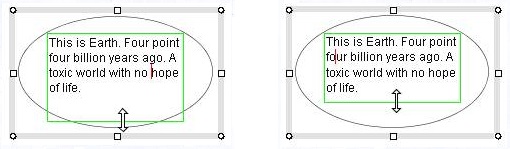 |
| Figure (g) Move the lower edge downward largely |
Figure (h) Move the lower edge upward. |
A group
A text box in a group can be handled in the same manner described above.
Original
Move the lower edge downward largely, thren the shape is also resized.
|
change a shape with a text box
=>Library components,
change shape button
|
The selected shape can be changed to the component shape registered in the Component lib dialog by pressing "change shape" button.
The shape having a text box will be changed to the component shape with keeping the size of the text box.
OriginalChanged shape
|
|
grouping text boxes |
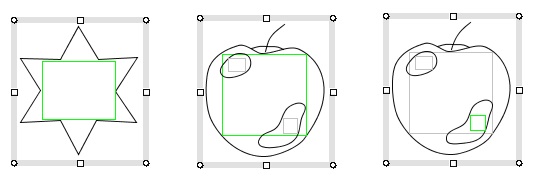
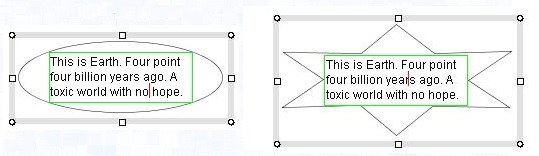
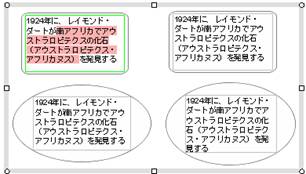
In appearance, a shape can have multiple text boxes using grouping function.
Inputting or editing a text in one of the text boxes can be done without ungrouping or
regrouping operation (activate text box).
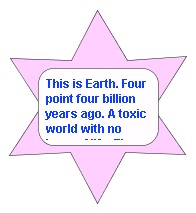
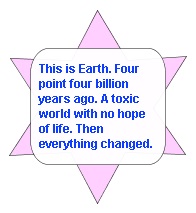
For example, the figure (a) shows that a round rectangle with a text box is placed inside a star mark
and the two shapes are grouped. Resizing this group smaller also makes the text box smaller and
consequently a part of the text becomes invisible. This kind of problem may offen happens when
we are doing detailed works.
The text box can be enlarged using the above mentioned function
(move text box boundary),
so that all the text is visible.
As the result, the opetaion for the text in a group is almost similar to the operation in a single shape.
Therefore, both the methods can be used properly according to the purpose.
|

Figue(a)
|
|
Figure(b)
|
Figue(c)
|
|
|
formatting

|
Select the "shape format" item in the popup menu,
then the following dialog will open.
Select "text box" tab in the dialog and set formats of the text
box.
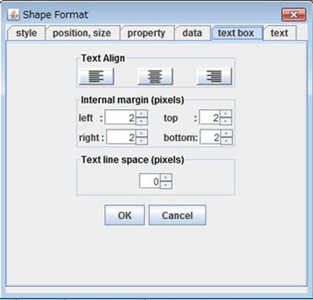
⋅ Text Align:text align left / text align center / text align right
These buttons are the same as the text align button.
⋅ Internal margine:left / right / top / bottom margin (millimeter).
⋅ Text line space:millimeter.
 =>Shape format dialog =>Shape format dialog
|
2. Editing text
return=>page top
Command:activate text box,
inputtng text, moveing text cursor,
selecting text, editing text,
setting font style, setting font style to menu,
text align
|
Operation
|
Description
|
|
activate text box
|
If you click inside an existing text box, the text box will be selected
and displayed with a green frame (see below). Here "green frame"
means that the text box is editable. If a gray frame is displayed in the text box, it is not editable.
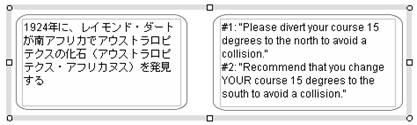
 : You can select a text box in a group by clicking inside the text box
( Figure_(a), (b)). : You can select a text box in a group by clicking inside the text box
( Figure_(a), (b)).
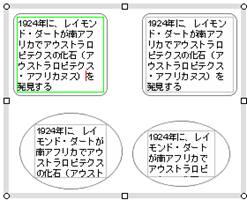
(a)Click on the left upper text box (b)Click on the right lower text
box
=>
Text box
|
|
inputting text
|
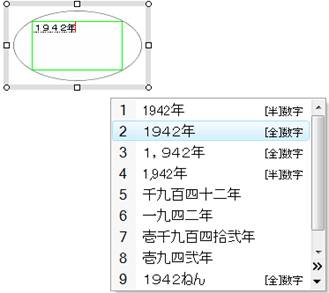
The way of inputting text is the same as ordinary word processors.
To input Japanese text, Kana-kanji converter is used. After the kana have been input,
they are converted to a kanji and displayed with a dotted underline.
If the converted kanji is not appropriate, a list of candidate kanji
for the input kana will be displayed by pressing conversion key or space key.
You can select the correct kanji moving cursor or specifying the number.
|
|
moving text cursor
|
The text cursor (caret) is displayed as the red vertical line and it indicates the text input position.
To move the cursor, click with the mouse on the desirable position in the text box,
or press the PageUp, PageDown, Home or End key.
|
|
selecting text
|
To select text, drag with the mouse over the text, then the selected text
part will be displayed with pink background color.
:
Click the mouse and click the mouse again with holding down Shift/Ctrl key,
then the text between the first click and the second click will be selected.
|
editing text

|
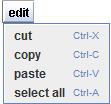
To cut or copy text, select the text and select "cut" or "copy"
menu item in "edit" menu.
To paste the selected text, move the text cursor to the paste position
and select "paste" menu in "edit" menu.
To delete text, select the text and click on the "del" button
or press "Back Space" key.
To delete one character, move the text cursor to the backward position
of the character and press "Back Space" key.
:
"Ctrl+x", "Ctrl+c" and "Ctrl+v" are the
accelerators of "cut, "copy" and "paste" commands respectively.
:
If you copy text from an external application (e.g. MS-Word) and paste
the text into a text box of this application, then the text will be pasted
as plain text (unformatted text).
The reverse-operation (e.g. this application -> MS-Word) is also the same.
|
|
setting font style

|
Setting of font family, font size, bold, italic, underline, super script/subscript and font color.
To set font attribute, click inside a text box, select text by dragging over the text
and finally specify the attribute in the "Font menu" dialog.
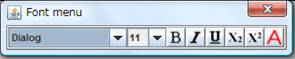
Font menu dialog
=>
font
:
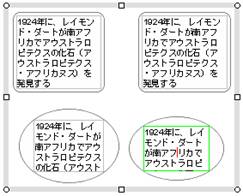
If any text isn't selected in the selected shape or group object,
the specified font attribute will be set to all the text in the selected shape or group (Figure_(a),(b)).
(a) A selected group (with two text boxes)
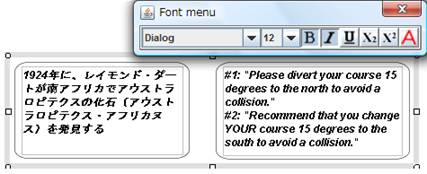
(b) Set Bold and Italic to the group
|
|
setting font style to menu
|
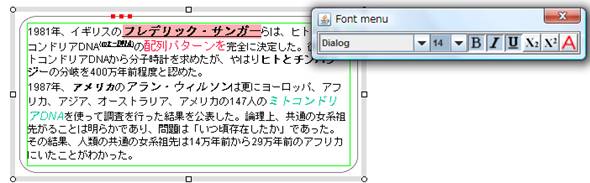
If the selected text has common font attributes, the attributes will be reflected to the
"Font menu" dialog. In the following figure,
all the characters of the selected text have the same attributes, i.e.
bold, italic, underline, so the corresponding buttons in the "Font
menu" are displayed as "selected".
If no text is selected, the attributes of the character before the text
cursor will be reflected to the "Font menu" dialog.
|
|
text align
|
text align left/text align center/text align right
=>
text align, shape format
|
|
 Home
Home