1. Editing shapes (cut/copy and paste)
return=>page top
|
Operation
|
Description
|
|
edit
delete

|
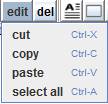
The edit menu items are the following:
∙ cut: The selected shapes are removed from the drawing, but stored in
clipboard.
∙ copy: The copies of the selected shapes are stored in clipboard.
∙ paste: The copies of the shapes in clipboard are placed at the right
lower position of the original shapes. You can use paste command repeatedly.
∙ select all: Select all shapes in the drawing.
∙ del: Delete the selected shapes. Back Space key can be used for delete.
 : :
(1) "Ctrl+x", "Ctrl+c", "Ctrl+v" and "Ctrl+a"
are the accelerators of the above commands.
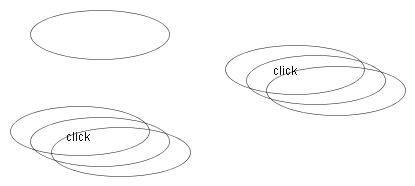
(2) If you continue paste, the selected shapes will be placed at the lower
right positions of the previously pasted positions.
(3) If you click on the canvas before pasting shape objects, the selected
shapes will be placed around the clicked point.
Using copy and paste commands, you can copy the selected shapes to other
page or other drawing file (*.draw file) in this application.
:
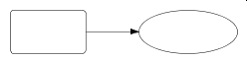
(1) If you copy an image from external program and paste it to this application,
the image will be pasted at the left top of the drawing. You can place
it anywhere using moving and resizing.
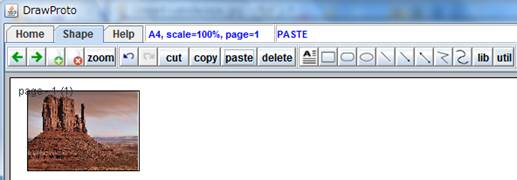
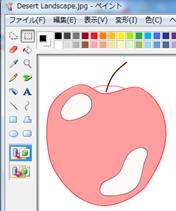
(2) The selected shapes in this application are also stored as an
image in clipboard by the copy or cut command, therefore you can paste
the image of the selected shapes to external program (e.g. MS Word, Paint).
The following figure shows the pasted image in MS Paint.
To delete a shape, select the shapes and click delete button or "Backspace"
key.
|
2. Setting attributes
return=>page top
|
Operation
|
Description
|
|
fill color

line color

font color

|
• Set a color of selected shapes
fill color button: set a filling color of a closed shape.
line color button: set a color on lines, curves or a border color of closed shapes.
Press the button, the following pull-down menu appears. If "no
fill" item is selected, the selected shapes become
colorless and transparent. If "fill color" item is selected,
the custom color chooser will be displayed.

: Select shapes before pressing the above mentioned button.
• Set a color of selected texts
Press the Font button(  ),
then the following Font menu appears. Next, the custom color chooser
will be displayed by pressing the button. ),
then the following Font menu appears. Next, the custom color chooser
will be displayed by pressing the button.

 =>Editing text setting font style =>Editing text setting font style
• Custom color chooser
The "imported colors" panel which enable to import
colors from selected shapes is added to the Java standard color chooser
(the upper panel on the following figure).
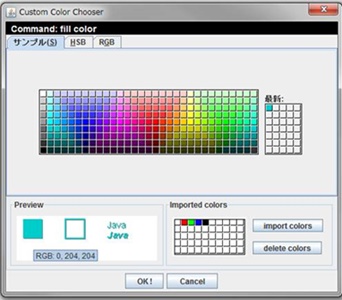
Custom Color Chooser
• Operation of the custom color chooser
| Operation |
Description |
| Set a color to selected shapes or texts |
• Select shapes or texts on the drawing panel (canvas) and press the fill color button
( ),
line color button ( }
or the font color button ( ),
then the custom color chooser will open.
• If you click a desired color on the Java standard
color chooser (the upper panel of the above figure) or the "Imported
colors" panel, then the selected color is displayed on the preview
panel.
• Press the OK button, then the selected color on the preview will be set
to the selected shapes or the selected texts.
:
The tooltip that shows exact R,G,B values can be used on every panel
of the above custom color chooser dialog including "imported
colors" panel and preview panel. |
| Import colors to the "imported colors" panel |
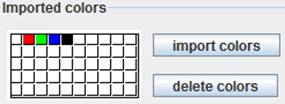
No color is imported to the "imported colors" panel just after
the Drawtop application is started. However, the white, black, red, green
and blue colors are shown on the panel for reference.The "Importing
colors" procedure is carried out in the following manner.
• Select shapes on the drawing panel (canvas) and click the "imported
colors" button, the fill colors, the line colors and the font colors
of the selected shapes will be imported to "imported colors"
panel. |
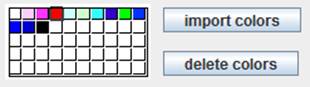
| Delete colors from the "imported colors" panel |
If you select a color on the "imported colors" panel, then
the selected color is displayed with the dark gray frames as the figure
below. You can select multiple colors by clicking a mouse with holding
down the Shift or Ctrl key.
Pressing the "delete colors" button, then the selected colors
will be deleted from the panel.
 |
|
3. Shape format dialog
return=>page top
Contents: position, size tab, style tab, property tab, data tab, text box tab, text tab, Draw panel information
|
Operation
|
Description
|
|
Shape format dialog
(pop up menu)
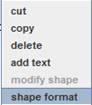
|
Press the mouse right button on the shape's boundary, then the dialog will
appear.
The following operations are available using the dialog.
・Moving/resizing a selected shape
by specifying numeric values => position, size tab
・Specifying a paint style of a selected shape => style tab
・Specifying a property of a selected shape => property tab
・Displaying data of a selected shape => data tab
・Displaying a text box and the text in the text box => text box tab、text tab
|
|
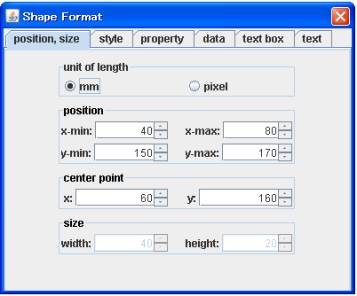
position, size tab |
The "position, size" tab is used for moving and resizing a selected
shape to create an accurate figure.
=>Examples-2 Accurate Figures.
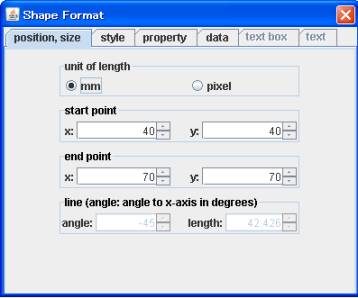
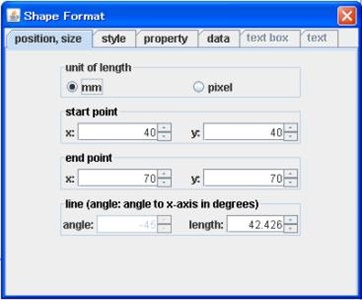
The dialog for a straight line.
If the selected shape is a straight line, then the following dialog
is shown.
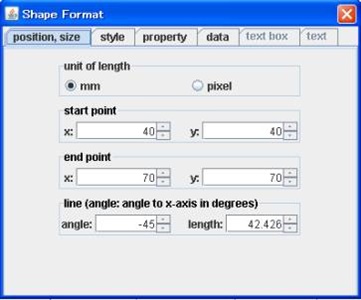
You can move or resize the selected line by changing numeric values in
the spinners.
• The x, y values of the start/end point: Change x or y value, then the
corresponding point will be moved immediately.
At the same time, the angle and the length values will be
updated automatically.
• The angle value: Change the angle value, the angle to the x- axis of
the selected line will be changed. As the result the end point will be
moved immediately and x, y value of the end point will be updated automatically.
:
The positive direction of the angle is counterclockwise.
• The length value: Change the length value, the length of the selected line will be changed.
As the result the end point will be moved immediately and the x, y values of the end point
will be updated automatically.
=>
The property of a shape and the spinners' values
The dialog for other shapes.
If the selected shape isn't a straight line, then the following dialog
is shown.
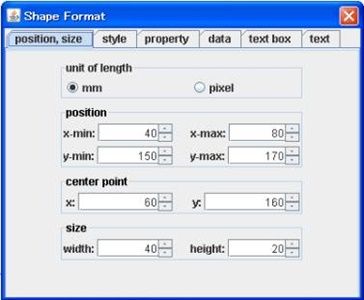
You can move or resize the selected shape by changing numeric values in
the spinners.
• The position and center point values:
Change one of the values of x-min, x-max, y-min, y-max, or center point x, y,
then the shape will be moved (translated) immediately.
All the numeric values in the spinners are related. For example, the x-min
value is changed, then the x-max value and center point x-value will be updated
automatically, because the operation is translation. As the same reason,
if the center point y value is changed, then the y-min and y-max value
will be updated automatically.
• The size values: Change the width or the height value, then the shape
will be resized immediately.
All the numeric values in the spinners are related. For example, if the
width value is changed, then the x-max value and the center point
x value will be changed automatically. Identically, if the height value
is changed, then the y-max value and the center point y value will
be updated automatically.
=> The property of a shape and the spinners' values
:
(1) The coordinate system of the canvas is as shown below. The origin of
the coordinate is the left top point of the canvas.

(2)The connector's connection is ensured when the shape is moved or resized
using the "position, size" tab.
 |
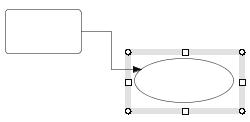 |
| Original |
Move the ellipse downward
using the "position, size" tab. |
|
|
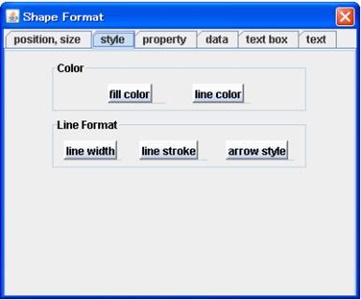
style tab |
You can set "fill color", "line color", "line
width", "line stroke" and "arrow style" by using
the buttons in the dialog.
=>
color、line stroke
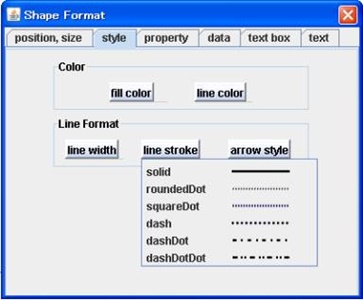
For example, if you press the "line stroke" button, then the following pull down menu will be displayed.
|
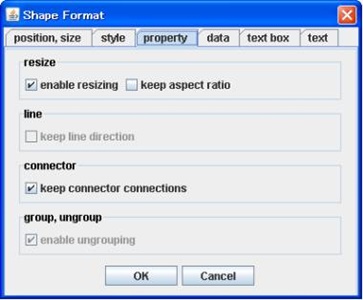
property tab
|
The "property" tab is used to restrict moving or resizing operation.
The main purpose of this function is to protect the size of a private ruler, protractor and so on.
Currently the following properties can be set to the selected shape.
・Behavior of a shape for each property.
|
Property
|
Behavior of line
|
Behavior of open curve (*) |
Behavior of basic or closed curve
|
|
enable resizing:off
(default: on)
|
Unable to resize the line by moving its end points.
Able to move the line.
|
Unable to resize the curve by moving its end points.
Able to move the curve.
|
Unable to resize the shape.
Able to move the shape.
|
|
keep aspect ratio
(default: off)
|
No effect
|
Able to resize the curve with keeping its aspect ratio (height /wide ratio),
however unable to move its end points.
|
Able to resize the curve with keeping its aspect ratio (height /wide ratio)
|
|
keep line direction
(default: off)
|
Unable to change the line direction by moving its end points.
|
No effect
|
No effect
|
keep connector connections
(default: on) |
A shape is unable to drag connectors when the shape is moved or resized |
|
enable ungrouping
(default: on)
|
Unable ungrouping operation
|
(*) open curve: unclosed curve such as unclosed polyline or
unclosed piece wise cubic curve.
・The display of a selected shape with a property
(a) Line
 |
| no property |
enable resizing:off |
keep line direction:on |
:
The small and dark end point mark (resize handle) means ineffective.
(b) Open(not closed) shape such as a polyline or piece wise cubic curve
 |
| no property |
enable resizing:off |
keep aspect ratio:on |
:
If "enable resizing" property is "off" for the line/curve,
no resize handle is displayed
and if "keep aspect ratio" property is "on"for the line/curve,
any of the south, north, east and west resize handle
aren't displayed.
(c) Basic shape and closed shape
 |
| no property |
enable resizing:off |
keep aspect ratio:on |
|
|
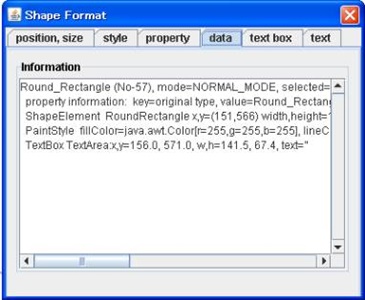
data tab |
The data of the selected shape is displayed in text.
|
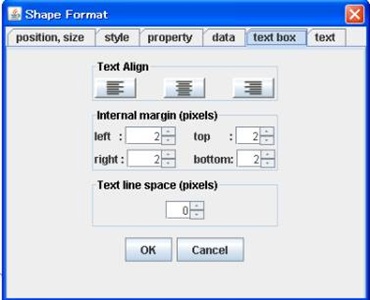
| text box tab
|
⋅ Text Align:text align left / text align center / text align right
These buttons are the same as the text align button. =>text align
⋅ Internal margine:left / right / top / bottom margin (pixels).
⋅ Text line space:line space (pixels).
|
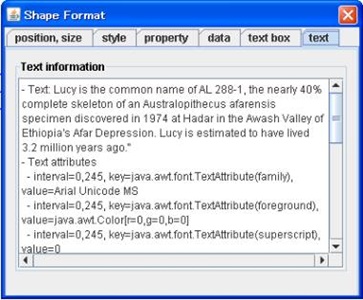
| text tab |
The "text" tab shows the text attributes (Bold, Italic, Underline,
color and so on). The tab is mainly used for debagging.
|
:
The property of a shape and the spinners' values
|
Property
|
line
|
others |
|
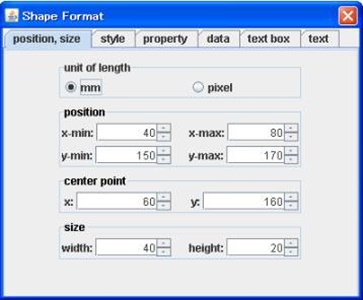
enable resizing: off
|
If "enable resizing" property is "off" for the selected line,
the above property tab of the dialog is displayed . The angle and length spinners are unavailable.
if you change the x or y value of the start/end point, the selected line will be moved (translated).
|
If "enable resizing" is "off" for the selected shape,
the above dialog is displayed. The width and height spinners are unavailable.
if you change one of the values of the position or center point, the
selected line will be moved (translated).
|
|
keep line direction:on /
keep aspect ratio:on
|
If "keep line direction" property is "on"
for the selected line, the above dialog is displayed. The angle spinner is unavailable.
if you change the x or y value of the start/end point, the selected
line will be moved (translated).
You can change the length spinner's value freely.
|
If "keep aspect ratio" property is "on" for the selected
shape, the above dialog is displayed. The all spinner are available.
If you change one of the values of the position or center point spinners,
the selected shape will be moved (translated).
And if you change the value of the width or height spinner, the selected
shape will be resized with keeping its aspect ratio.
Therefore, for example, if you change the width spinner's value, then the
height spinner's value will be changed automatically.
|
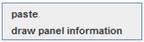
4. DrawPanel information dialog
return=>page top
|
Draw panel information
(pop up menu)
|
Press the mouse right button on the place where no shape exists, then the
popup menu will appear. Select "draw panel information" menu,
then the dialog will appear.
|
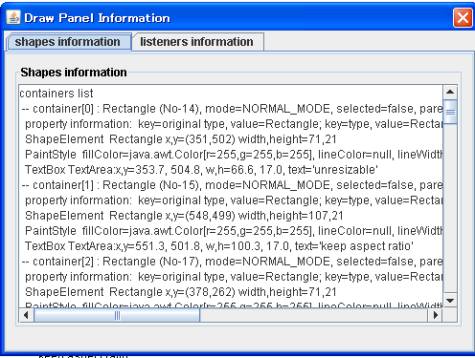
| shape information tab
|
This "shape information" tab shows the list of the shapes
currently displayed in the canvas. This tabs is maily used for debugging.
|
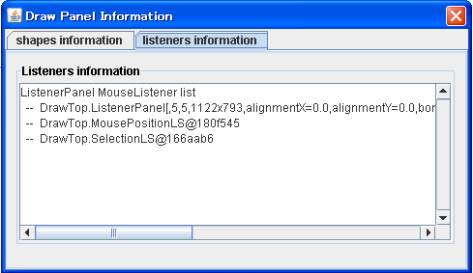
| listener information tab
|
The "listener information" tab shows the list of the mouse listeners
which are set to the draw panel. This tabs is maily used for debugging.
|
|
 Home
Home